
WARNING....very picture heavy!
Happy New Year to everyone! I cannot believe it has been so long since I posted on my blog! Thank you for being patient and not dropping me if you are one of my followers! I will try to do more posts in this new year!
I joined a new group and immediately wanted to join a swap. The swap I chose was for a mini album made out of any Graphic 45 collection. I did not have any such collection so went shopping online and ordered the Secret Garden set. This is the first time I have ever used a collection of any paper company. I have never purchased things like stickers and chipboard and such but knew I had to have almost everything so ordered it all!!! lol
The other requirements were you had to make at least four pages and it had to have a chipboard cover. You had to use at least 9 embellishments. It could not measure more than 4x4.
The first thing I did was decide what type of book I wanted to make. I had purchased the tutorial on making a box book from Paper Hoarder Disorder's shop on Etsy. The directions actually make a book that measures about 5x7. I adapted it to make this little 3x4 album.

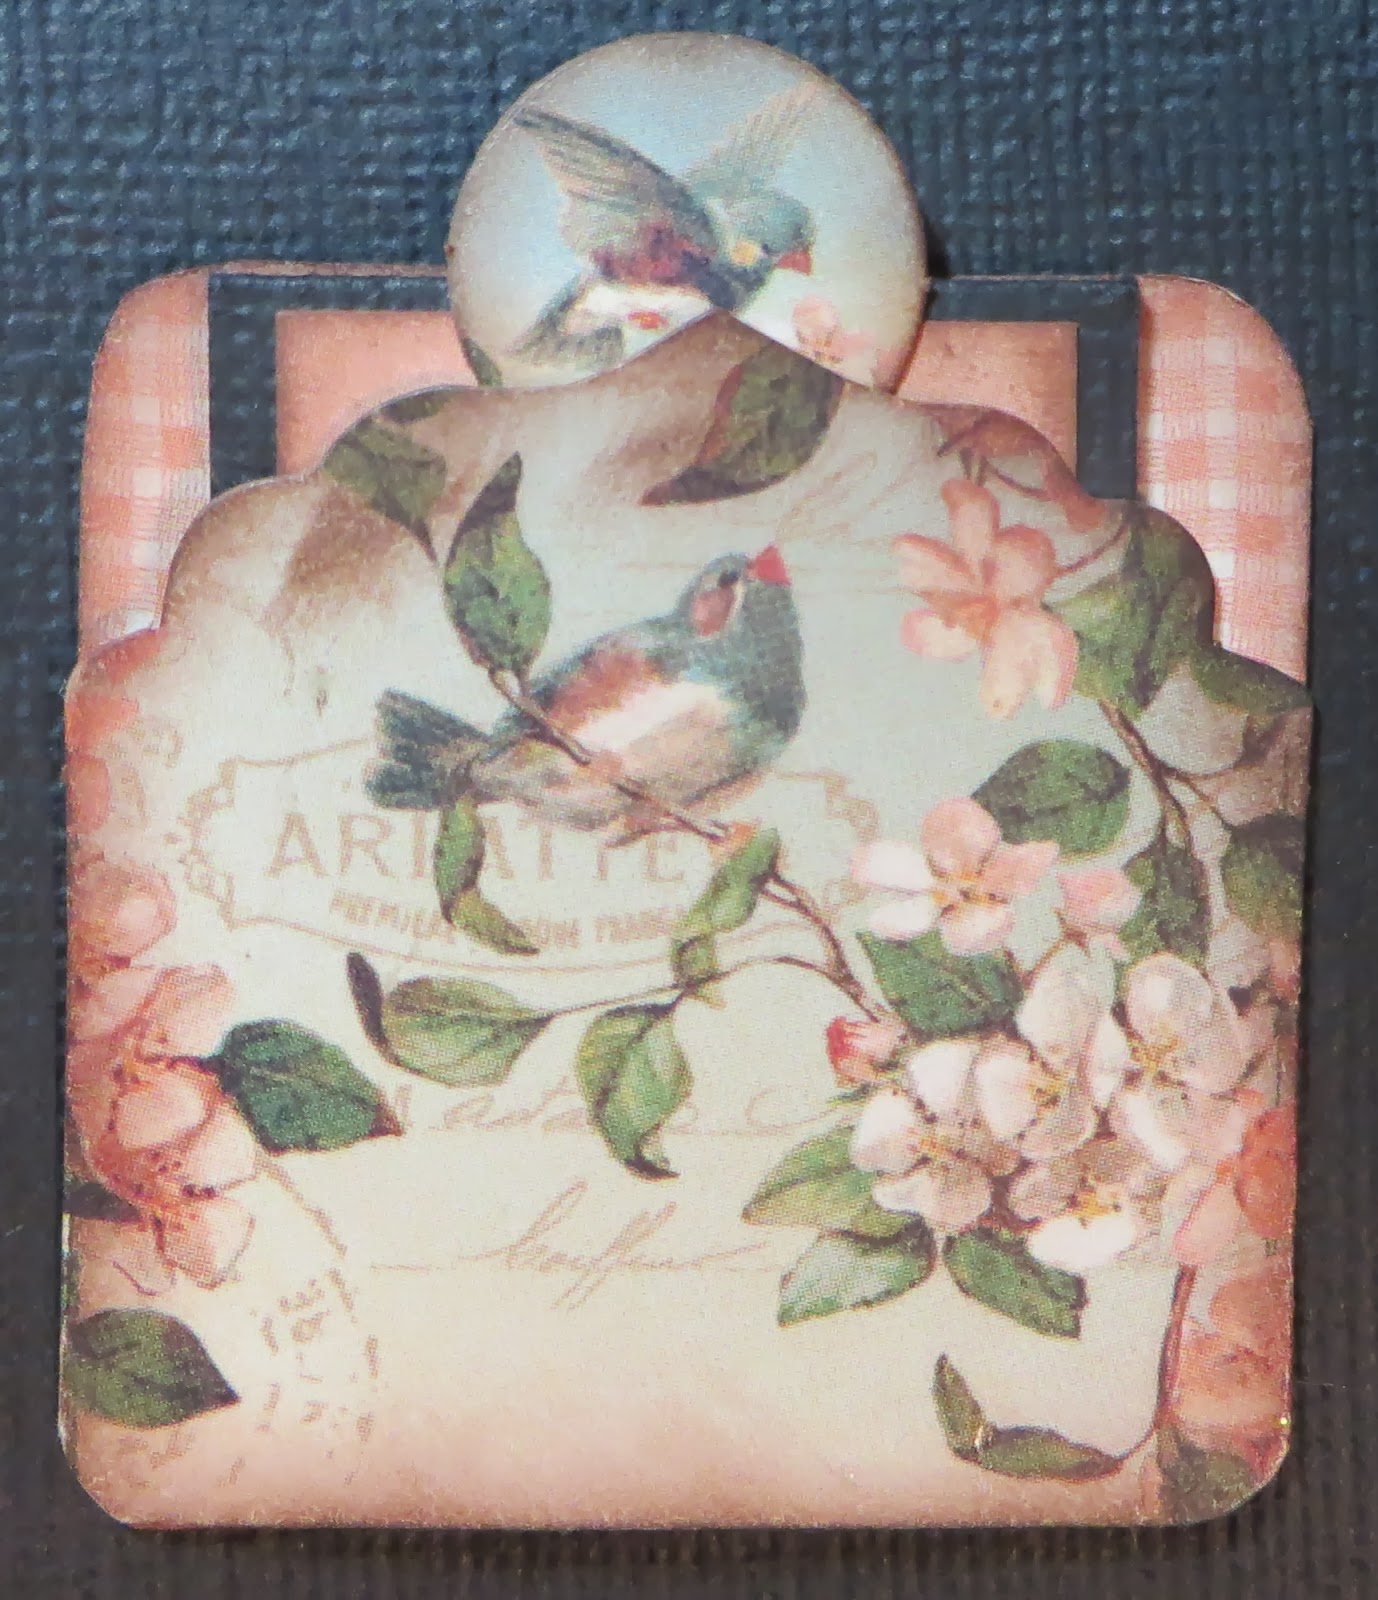
This is the top of the album. It has a pull out mini album which has a little pull out tag. The
little bird cage charm is one I thought went perfect with this paper line.
This is a side view that shows the metal embellishment I bent to fit over the edge of the box. It attaches to a magnet to hold the box closed.


When the lid is lifted the sides fall down exposing the mini album.

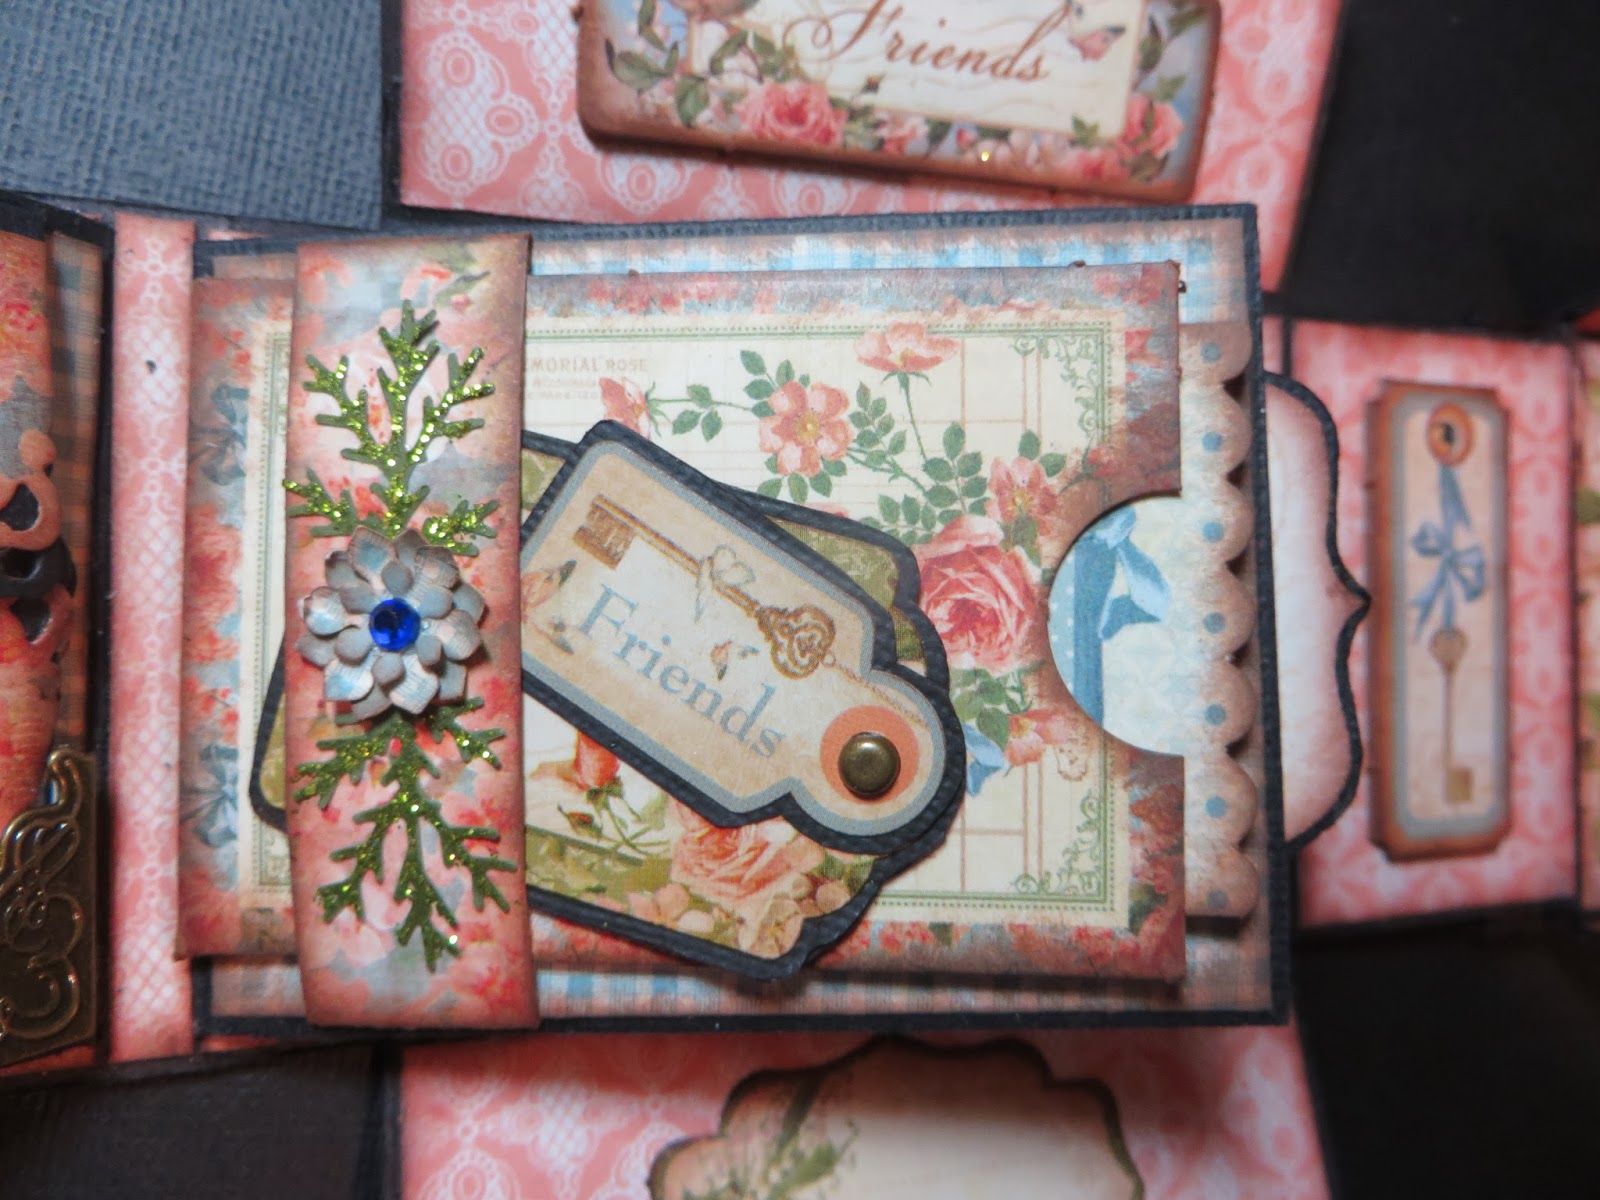
On the first page I added a pocket which houses a mini circle album. The little journal tag is a chipboard piece from the collection but I added a key charm.

Front of circle album

Back of mini circle album.

This photo is of the next pages but the color is totally off. lol The other pictures depict truer colors.

This is a fairly simple pocket page that hold two small tags.


This page is also a pocket page with the pocket made by using a MS fence punch. It also hold a mini pocket which holds a tiny foldout album. The tiny purple flowers are made from an old punch. The leaves or from a new die I just got.


The next pages are simple pocket and fold out pages.

This pocket holds a pull out tag that holds another smaller tag under a belly band.


The back of tag


This is a simple fold out page. I popped a couple of the chipboard pieces to form the closer. The twine bow actually just slips off the side so you do not have to untie and tie. I added another key charm for decoration.


The next pages are another pull out mini foldout and some more tags type things.

I used one of my new spellbinder die to make the flap and also for the fold out edges. The metal bird is just another piece of stash that I didn't know I even had! lol I used a couple metal corners to hold the foldout.

The flap is help down by a magnet hidden in it as well as one hidden in the foldout.

The inside of fold out.

The next page has a pocket from the collection holding a tag from the collection.


The back of the tag.


This is the last of the two sided pages. The first one is a very simple pocket and it hold two little stamp shaped tags.


This was one of the pages I wanted to do when I signed up. It has an acetate pocket that the little envelope fits in. I really thought it would be the best page ever but it did not turn out half as good as my mind said it would! lol

Pocket with out the envelope in it.

The little envelope holds a tiny fold out album. It is also held shut with magnets.

Little foldout

Inside of foldout.

This is the back of the open box album. The center is a tag from the collection and the other three embellishments are chipboard from the set.

The last page is made from three stamp shaped squares glued to form a pocket. It holds one tag.


Each page is actually a pocket and each contains a tag.

Here is a front photo of four of the tags and a back photo of the 5th. Each tag looks the same on the back. I stamped them with a new journal stamp I bought. I fussy cut one page of the paper to use for the tops of each tag. I added a belly band to the bottoms so the person who receives it may add photos or more tags or whatever they would want.

As you can see, I held my usage of stickles to a very minimum. lol I did ink around every edge for a distressed look. I sure hope whoever gets this little album will like it. I can hardly wait to get one in return!!! I did have a lot of fun working with a collection and also working with the tiny elements. Almost everything about this album is new......from the tutorial, papers, stamp, and even having to use a collection! Thank you all for stopping by. May God richly bless you all in 2014!!!
Challenges:
Heck of a Challenge- new.......all most everything...lol
Crafting by Design- anything goes
Crafty Creations- anything goes
Creative Moments- anything goes
Diva's by Design- anything goes
A Gem of a Challenge- anything goes
Artisitc Inspirations- anything goes
Through the Craftroom Door- anything goes
Hobby Cutz- anything goes
Inky Impressions- anything goes
Simon Says- something new
Crafty Creations- anything goes
Creative Moments- anything goes
Diva's by Design- anything goes
A Gem of a Challenge- anything goes
Artisitc Inspirations- anything goes
Through the Craftroom Door- anything goes
Hobby Cutz- anything goes
Inky Impressions- anything goes
Simon Says- something new
Crafts 4 Eternity- something new
Hiding in My Craft Room- anything but holiday
Scrap Creations- something new
Little Red Wagon- something new


_-_Copy_-_Copy%5B1%5D.jpg)


_-_Copy_-_Copy%5B1%5D.jpg)


Oh wow, this is absolutely stunning and I love the shabby vintage papers and design.
ReplyDelete{Would love you to visit my blog and join my 130,000 Page View Give-Away. Thank you so much, if you have already entered, and good luck.}
Wishing you all the best that 2014 has to offer.
Hugs
Desíre
{Doing Life – my personal blog}
These are all so gorgeous, Moshie! I love the feminine and vintage look that they have! So pretty! Thanks for joining us at the Simon Says Wednesday Challenge Blog! Happy New Year! :)
ReplyDeleteBeautiful mini album! Thanks for joining us at Crafts 4 Eternity this week Happy New Year! hugs x
ReplyDeleteLove all the details in this mini album.
ReplyDeleteThanks for playing with us at Hobbycutz.
Jennyfer,DT
A lovely creation. Thanks for sharing with us at A Gem of a Challenge.
ReplyDeleteMags
x
Fantastic project! Thanks for joining at Heck of a Challenge: New
ReplyDeleteHugs
Dewi
Wow! Stunning design and such gorgeous details.....I'm thinking of all the time and effort put into this! Happy New Year and thanks for sharing with us over at Little Red Wagon this week.
ReplyDeleteWow! I am speechless. This is gorgeous. I want to be in your swap group (only so I can get this from you). So beautiful and I'm sure the person who receives it will feel very special. Thanks for joining us at Crafty Creations Challenges. Happy New Year.
ReplyDeleteWOW - a beautiful creation Moshie, a stunning design and such wonderful elements and gorgeous papers!!
ReplyDeleteThanks so much for joining Simon Says Stamp Wednesday Challenge
hugs
Heather xx
Diana!! Another beautiful creation!! It is wonderful and there is a very lucky lady out there who will receive it.
ReplyDeleteThis is gorgeous. You have worked so hard on creating this box. Love the papers and the metal embellishments.
ReplyDeleteThank you for sharing this with us at Diva's by Design.
Hugs Sharon. x
{Nellie’s Handmade Cards}
What an awesome project...a real treat for the eye...thanks for joining us at Divas by Design!
ReplyDeletexxx Margreet
what a fab projectso refreshing, goodluck in our challenge over on artistic inspirations x
ReplyDeleteWow, this is absolutely fantastic! So very pretty! Thank you for joining us at Heck of a Challenge for our latest challenge!
ReplyDeleteClaire xx
HoaC DT
What a delightful and detailed project! Thank you for sharing wit us at Creative Moments. Leona (DT) x
ReplyDeleteThis is absolutely beautiful! I love this mini in a box from Paper Hoarder, I also bought her tutorial. I love how you altered it to fit the size you needed.
ReplyDeleteYour work is just beautiful, congratulations¡
ReplyDeleteThis is soooooo lovely. I can't imagine how you came up with such a beautiful idea , but you did !Impressive!
ReplyDeleteThis is stunning, do you have a tutorial for purchase for the size this 3x4 size?
ReplyDeletersantoro40@yahoo.com