I think I am finally getting back in the swing of things and am learning
to scrap on my own instead of depending of others to keep me going!!!
lol This mini album is from a wonderful pattern from
Paper Hoarder Disorder.
I love this pattern so much I plan to use it again and again. In fact,
I have a second one started to make into a vacation album and scrap our
trip to Yellowstone Nat. Park last month. There is so much space for
recipes or photos or whatever items you want to preserve in a mini
album.
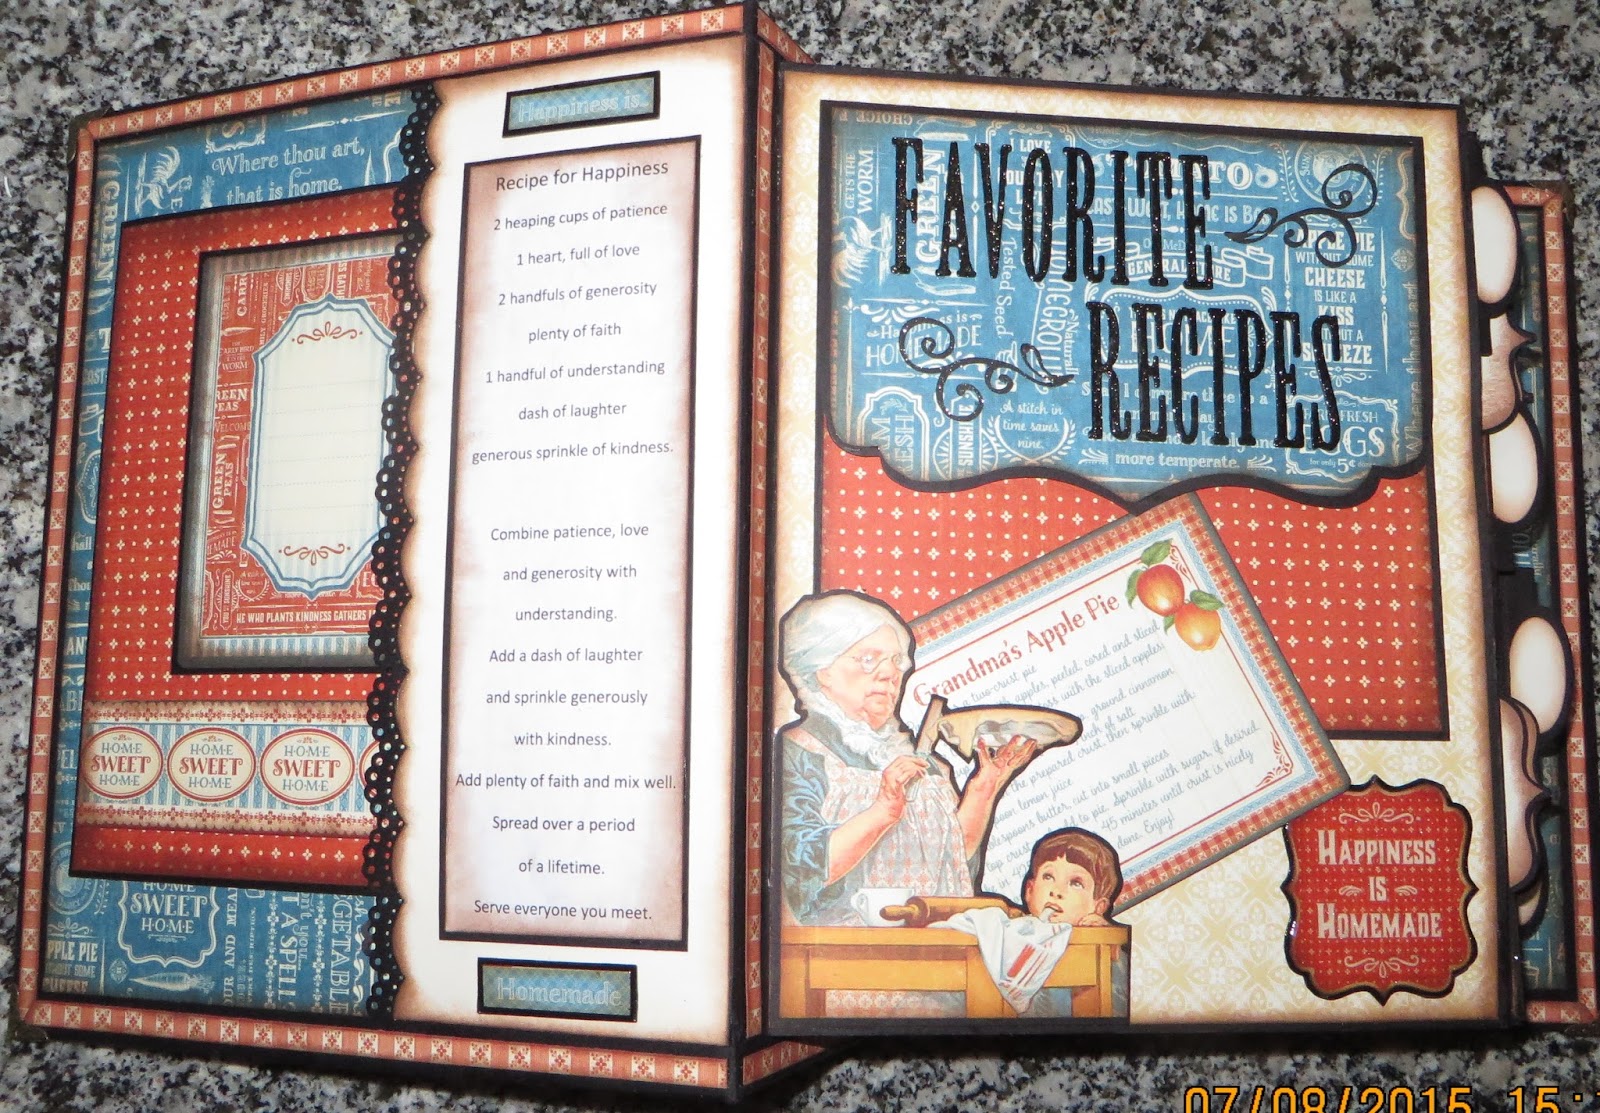
The only patterned paper I used was Graphic 45 Home Sweet Home 12x12. This was quite a challenge for me as I usually use all sizes of the paper pads when I make a project. The black and cream sheets are plain cardstock from Recollections. The flourishes through out the book are a die cut from my cricut. I used ColorBox Chestnut Roan ink around all the papers.
I did not embellish the cover as I wanted it to fit on a book shelf without things getting smashed. The front does protrude some for the pocket that hold the recipe holder. The font through out the book is Abigail from Quickutz. I coated them as well as all the flourishes with clear Wink of Stella. I did top the letters off with Glossy Accents for more dimension. I added metal corners on the covers just to protect them.
When you remove the card holder this is what the front covers looks like.
The card holder folds backwards to make a tripod. It has a clear page that hold whatever recipe you are making. This is also laminated for easy clean up if you are like me and tend to get part of the ingredients on the recipe itself!
This is the inside of the front cover.
The cover pocket holds a little foldout in which you can store several of your favorite recipes. The blue flap on the first page lifts and has a magnet closure so it will hold recipe cards also.
The next pages:
The pull out on this page is kind of like a clip board. It also has a magnet closure so will hold cards securely that you may be saving "that special day" recipes for a quick find.
the next pages:
The right side of this set of pages has am fold out held shut with a tag. When you lift the tag from it's pocket, the top and bottom both open and show a few conversions that are common. The center is lined where you can add your own conversions if you desire.
Next pages:
The left side contains two built in pockets. The bottom holds two tags from the collection. The top hold a print out from the University of Nebraska the list some ingredient conversions.
The back of this little conversion booklet has lined paper so you can add your own conversions or notes.
Next: The decorations on this set is just fussy cuts from the paper in the collection. I did use pop take on the four on the right page so they have a little dimension.
The right side has kind of a double pocket and each contains little booklets.
Next pages: Again the decorations are just fussy cuts mounts on black paper.
The left side has a type of waterfall book attached. The first page does cover the water fall part. There are several magnets to hold these pages closed. Each turn of each page reveals a pocket or foldout of some sort.
Next comes the Kiss the Cook pages.
The pocket on the right contains this little booklet. Each page has a pocket where each can house several recipe cards.
The pocket itself is a fold out. It is held shut with magnets.
Last set of pages:
The left side is a booklet that is also held shut with magnets. Each page has a pocket that holds tags cards or whatever you choose.
The last page and back cover:

The back cover has a matching booklet to the front cover.

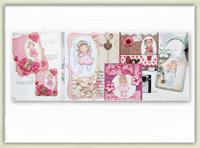
This mini album is made of four large pocket pages and eight half sized pocket pages. Each large pocket page contains a large tag with pockets on both sides to hold lots of recipe cards.
Each half page contains a small pullout tag that has a flap that folds up to hold cards securely as you insert or remove tags. Each of these can hold several recipes too. I love the half pages as they can turn separately of each other which to me is just fun interaction! lol
The binding is very plain. I added a fussy cut oval from the paper. I mounted it on black cardstock and topped it with glossy accents.
The back has one of the cards from the collection mounted on black paper.
Thank so much for stopping by. I hope you enjoyed my cook book and if you would like the pattern you may purchase it from Cristi at
Paper Hoarder Disorder on Etsy. Her patterns and videos are extremely well made and very easy to follow. There is just so much you can do with this pattern and this is one of the more fun projects to work on.
GOD BLESS


_-_Copy_-_Copy%5B1%5D.jpg)


_-_Copy_-_Copy%5B1%5D.jpg)


